A fundamental part of the UX knowledge base comes from user interviews and testing sessions. When possible, we try to document these meetings by video so that we can interact instead of taking notes, and to share our findings with others outside of UX.
Being able to show those not involved in the exact interaction that goes wrong (or right) has a tremendous value and makes the entire team understand the situation.
Recording user behaviour on a desktop or laptop screen has been possible with screen recording software or by just pointing a camera on a tripod at a screen. But as more and more mobile apps make their way into the Visma portfolio, this presents a different challenge.
While some phones offer screen recording, this is not always a possibility for all tests, nor does it capture hand gestures or other interactions going on outside the screen.
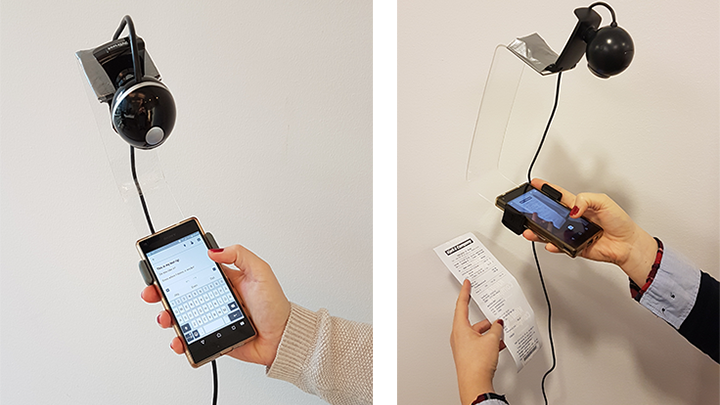
To capture the mobile screen and it’s surroundings, I built a mobile testing rig, inspired by similar devices by Mr Tappy and CamHolder.
Practical steps
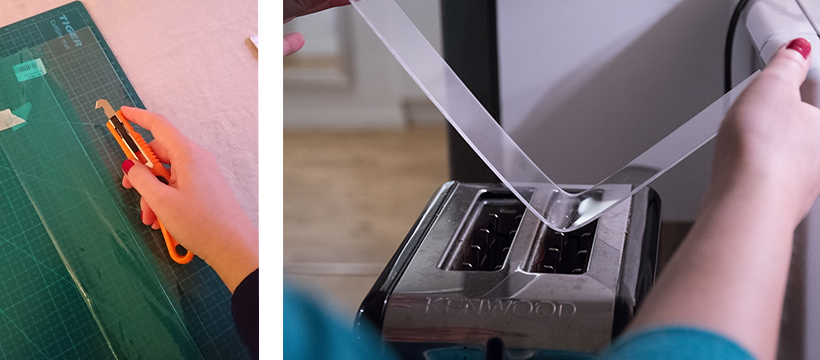
I cut a sheet of plexiglas into a 5 cm wide strip. Using the heat from a toaster, I then bent the strip into a U-shape.

I attached a webcam to the top of the rig using duct tape, looking down at the bottom. The video feed is recorded on the computer, in my case using ScreenFlow. As the recorded image is upside down, I use the edit function in the software to flip the video.

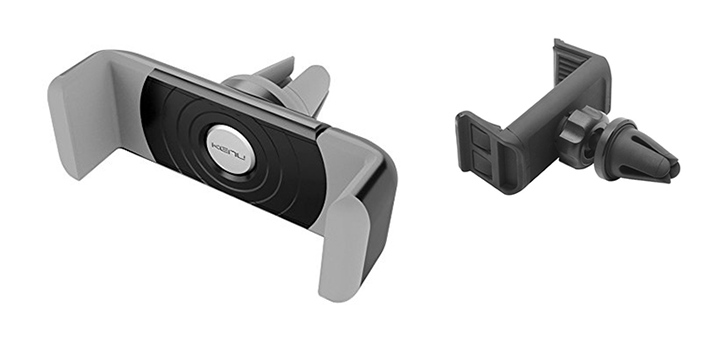
To be able to attach any phone to the rig I used a phone holder intended to hold a phone to the car vent. The holder clamps both the phone and the bottom part of the rig together. This way the user can hold the phone in their hand or if the phone holder is removed the rig can be placed flat on a table.

Live test
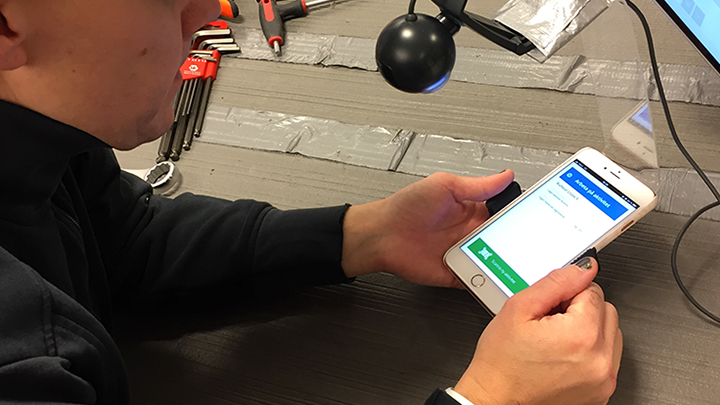
I tested the rig with real users and a prototype, in their true work environment. Once the phone was clamped into place, they were able to hold the rig in a manner similar to the natural cradle hold. As they moved, the plastic rig did bounce a little but the image was still quite clear.
The main issue was the angle of the rig that placed the camera in the line of sight between the user and the phone. With a little tilt they could still see, but it did create a distraction. Some glare from ceiling lights were also visible on the mobile screen.


Lessons learned if you want to build the same thing:
- Consider the shape of the rig so that the camera does not block the user too much but still allows a wide enough image.
- Use a material that is thick enough to allow for a stable shape. (I used 3 mm, but 5 is probably better.) Don’t forget to soften the sharp edges. User testing should not involve cut hands!
- Using clear plexiglass means the camera function can still be used.
- Not all web cameras handle the short depth-of-field of this setup. Choose a webcam where the focus can be adjusted. (I had to try 4 different cameras before I found one that did the trick.) Audio from the webcam is a plus. A long cord is also good for freedom of movement.
- Use a video recording software that can flip the image to the right direction.

